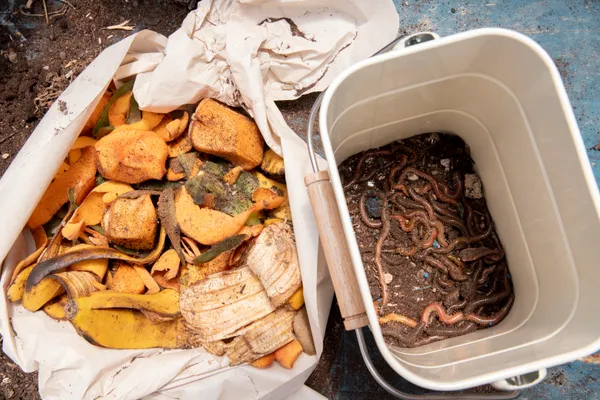
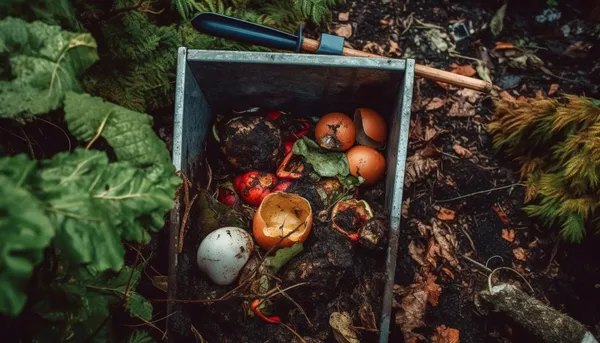
Fruit scraps on paper and worms in a bin, Freepik.
Living in an apartment doesn’t mean you have to miss out on the benefits of composting. In fact, vermicomposting — a composting method that uses worms to break down organic waste — has become an increasingly popular solution for city dwellers.
Unlike traditional composting, worms naturally aerate the compost as they move through it, reducing the need for manual intervention. Vermicomposting is well-suited for indoor environments, for apartments, where the surface area is limited and traditional composting isn't always feasible. Even a tiny bin can chow down on your kitchen scraps — and if you do it right, your nose won’t even notice it’s there.
Vermicomposting produces a fertiliser rich in nutrients that works wonders for your indoor plants or balcony garden. In this guide, we’ll explore how you can compost using worms in your apartment, and share tips to ensure your composting journey is smooth and mostly odourless.
Choose the right worm composter for your space
One of the first decisions you’ll need to make is what kind of bin to use. The good news? A simple plastic tumbler or wooden box with a lid can do the trick. What’s important is choosing a size that fits your available space and food waste output.
Plastic bins are cheap and easy to move. What about wooden ones? They offer better insulation and breathability. No matter the material, your bin must have proper ventilation and drainage. Small holes help control moisture levels and ensure your worms can breathe.
Use food-grade plastic tanks as worm bins
Food-grade plastic tanks, like the ones used for rainwater harvesting, can offer you a practical entry point to vermicomposting. Such a plastic storage ensures that no harmful chemicals leach into the compost, making it safe for plants and soil.
Containers of this kind are designed to withstand various weather conditions and aggressive pH levels, making themperfect for composting. Furthermore, many of these tanks come with features like drainage outlets, which can be beneficial for managing excess moisture in the compost.
It is now time to learn how to prepare the worm bin:
- Start with a thorough cleaning. Even if the tank is labeled food-grade, give it bin a good scrub with some gentle soap to remove any residues or lingering odours that could harm your worms. Rinse it and let it dry.
- Provide proper ventilation. Worms and beneficial microbes thrive in oxygen-rich environments, so ventilation is non-negotiable. Thus, make sure to drill small air holes in the lid and on the sides of the tank. These should be just large enough to let air in while keeping pests out. If you're concerned about insects, cover the holes with fine mesh or screen material.
- Ensure easy access. Easy access is essential for regularly adding food scraps and harvesting the finished compost without disrupting the worm ecosystem. You’ll need to create an opening. This could be a removable lid, a hinged hatch, or even a cut-out section that can be covered when not in use.
- Plan for drainage. Worm bins generate moisture, and without drainage, the environment can quickly become soggy and anaerobic — conditions that are harmful to worms. Just place a collection tray underneath your tank and open the tap occasionally to drain excess liquid. If not, you can drill a few drainage holes in the bottom and place the tank on bricks to elevate it.
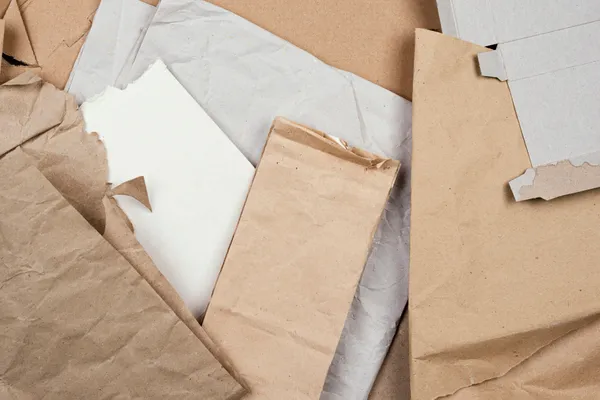
Flattened carton and cardboard, Freepik.
5. Create a comfy home with bedding. Before adding worms, line the bottom of your bin with wet bedding. This not only gives worms a cozy place to settle in but also a food source for your worms to eat in the early days. Materials like shredded paper and cardboard, coconut coir, or a mix of all three are excellent choices. The bedding should be damp, similar to the feel of a squeezed-out sponge.
Let the bin “settle” for a day or two to stabilise moisture levels, then introduce your worms and start feeding them small amounts of food scraps.
Prepare your wooden bin for vermicomposting
Wooden bins are a popular and eco-friendly choice for vermicomposting, especially among those who value aesthetics and sustainability in their home setups. Unlike plastic bins, they’re breathable and naturally regulate moisture and temperature.
Wooden bins are a solid choice for worm composting, especially if you're into DIY. If you’ve got some basic tools and a weekend afternoon, building one is a fun little project.
Find out how to set up yours:
- Choose the right wood. The first step is selecting untreated, non-toxic wood. Cedar, pine, and fir are commonly used, but make sure they haven't been chemically treated — pressure-treated wood contains preservatives that can be harmful to worms. Reclaimed or upcycled wood is a great idea, as long as you're confident about its origin and safety.
- Size and structure. A beginner bin should measure about 1 to 2 feet (30.48-60.96 centimetres) in depth, with a surface area of at least 2 to 4 square feet (0.185806-0.371612 metre square), depending on how much kitchen waste you generate. You can build a basic wooden box with a flip-top lid. No need for complex carpentry here, just make sure you can open it easily.
- Ventilation and drainage. Worms need air to breathe, so make sure the bin has ventilation holes on the sides and a few drainage holes at the bottom to prevent waterlogging. Place a plastic tray underneath the bin to catch any excess liquid. “Worm tea” actually makes a great liquid fertiliser for your plants!
- Preparing the interior. Before adding worms, add about 4 to 6 inches of bedding. Shredded newspaper, cardboard, coconut coir, and aged leaves all work well. Moisten the bedding slightly. This creates a comfortable and safe home for your worms.
- Protecting the wood. If your bin is exposed to outdoor elements like rain or Sun on a balcony or veranda, consider sealing the exterior with a natural, food-safe oil like linseed oil. Avoid varnishes or synthetic sealants, which may off-gas or leach into the compost.
Benefits of lining your with plastic
Lining a wooden worm bin with a plastic bag can help maintain the necessary moisture levels within the bin, creating an optimal environment for worms. Furthermore, lining prevents the wooden structure from absorbing excess moisture, reducing the risk of rot and extending the bin's lifespan. A plastic lining can also make the bin easier to clean and manage, especially when harvesting compost.
Nonetheless, we suggest you to take certain precautions:
- Secure the lining: Ensure the plastic is securely attached to prevent it from shifting, which could expose the wood or create pockets where moisture can accumulate.
- Regular monitoring: Check the bin regularly for signs of excess moisture or mould. Adjust the bedding or ventilation as needed to maintain optimal conditions.
- Use food-grade plastics: Stick with food-grade plastic — you don’t want mystery chemicals seeping into your compost tea. You'll want to minimise the risk of chemical leaching.

Worms on soil, Freepik.
Order worms for your indoor vermicomposter
Once your vermicompost bin is set up and ready, it's time to bring the worms into the game. Starting with the right species sets the foundation for a healthy, productive vermicomposting system. Thus, avoid using common garden earthworms — they’re not suitable for the conditions inside a composting bin and will likely struggle or die.
Compost indoors adopting the most trusted species, the red wiggler (eisenia fetida) #ad. They’re fast breeders and voracious eaters. Red wigglers also tolerate a wide range of conditions, making them ideal for beginners.
You might be wondering where to find them. Thankfully, many local garden centres now stock them, particularly those that support organic gardening practices. If you prefer the convenience of home delivery, online worm farms will ship live worms straight to your door.
Another wonderful option is to connect with your local composting community. It’s a great way to start small and gain insights from from someone who already has experience composting in similar conditions.
Best practices for successful worm farming: feed your worms
Worms aren’t picky eaters, but they do have preferences. Great food sources include:
- Fruit and vegetable peelings;
- coffee grounds and filters;
- crushed eggshells;
- tea bags.
Avoid feeding them meat, dairy, oily foods, spicy items, or citrus peels, which can create bad odours and attract pests.
You might mess it up the first time — that’s okay. Don’t go overboard with the scraps, as too much food turns the bin into a stinky mess. Feed the worms gradually and observe how quickly your worms process the material.
Yes, you can feed melon and watermelon rinds to your composting worms. Worms go wild for melon and watermelon rinds. Just don’t overdo it! Too much can make the bin soggy and bring in uninvited guests like fruit flies.
To keep things balanced:
- Chop or blend the rinds into smaller pieces.
- Mix them with dry bedding like shredded cardboard.
- Always bury the scraps to keep smells down.
Why dairy products are to avoid in vermicomposting
It's generally recommended not to add dairy products to a vermicomposting system. While these items are technically compostable, they pose several challenges in a worm bin environment.
Dairy decomposes rapidly, producing strong odours that can attract pests such as flies, and rodents. This can lead to infestations. Furthermore, dairy items are typically acidic. Adding them to your worm bin can lower the pH, creating an environment that's inhospitable for worms, which prefer a neutral to slightly alkaline setting.
More importantly, composting worms lack the necessary enzymes to effectively break down lactose and complex proteins found in dairy products. Introducing dairy can disrupt the microbial balance within the bin and may lead to the accumulation of partially decomposed waste.
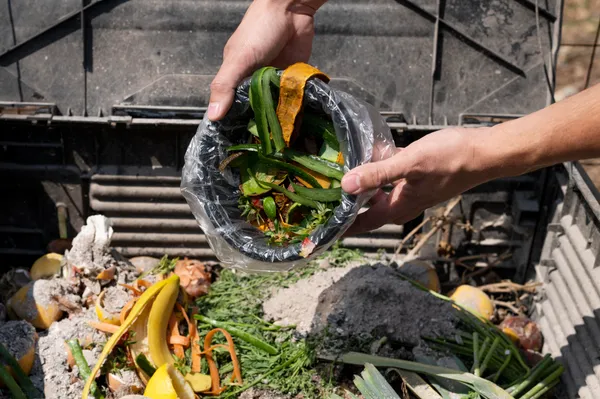
Hands disposing of kitchen scraps in a bin, Freepik.
Compost with worms on balconies and verandas
If you have access to a terrace, or veranda, you can take advantage of natural airflow and sunlight to enhance your composting setup. Additionally, outdoor vermicomposting allows for larger bins and less concern about indoor odour or mess. However, weather can be a challenge.
Manage moisture and temperature
Worm bins should feel like a moist forest floor. If it’s too wet, add dry bedding like shredded paper. If it’s too dry, sprinkle in some water. Drainage is key here. You don’t want water pooling at the bottom of the bin.
Temperature matters too. Keep your composter somewhere protected from direct Sun and freezing air. Shaded balconies or indoor corners can help you out.
Worms aren't happy with extreme temperatures. Keep them between 15–25°C (59–77 degrees Fahrenheit). Outside that range? You’ll need to help them out — maybe insulate the bin in winter or move it into the shade during heatwaves.
Maintaining optimal temperatures is crucial for the health and productivity of your composting worms. Extreme temperatures — both hot and cold — can significantly impact worm activity and survival.
Vermicomposting in hot weather
High temperatures can be detrimental to worms. Here are some strategies to keep your worm bin cool:
- Shade the bin. Hot day? Place your worm bin in the shade — worms hate heatwaves.
- Enhance ventilation. Ensure your bin has adequate airflow to dissipate heat.
- Use moisture for cooling. Maintain appropriate moisture levels; moist bedding can help regulate temperature through evaporative cooling.
- Avoid overfeeding. Excess food can decompose rapidly, generating additional heat. Feed your worms smaller amounts more frequently during hot period.
Vermicomposting in cold weather
Cold temperatures can slow down worm activity, or even make them to go dormant. Here’s how to help them through:
- Insulate the bin with straw, shredded paper, or foam.
- Relocate it indoors if you can. Laundry rooms, garages, or sheds work great.
- Feed less, as they eat slower in winter, and leftovers can go rotten.
- Watch out for the moisture. Ensure the bedding remains moist yet not wet: too much water can freeze and harm the worms.
General tips for temperature regulation
By proactively managing the temperature of your vermicomposting system, you can ensure efficient composting and high-quality vermicompost. Here are some ideas that will help you with temperature regulation:
- Use a thermometer. Regularly monitor the temperature inside your worm bin using a compost thermometer to ensure it stays within the optimal range.
- Adjust bedding depth. A thicker layer of bedding can provide additional insulation against temperature fluctuations.
- Avoid extreme locations. Place your worm bin in areas that are protected from extreme weather conditions, such as heavy rain, snow, or intense Sun.
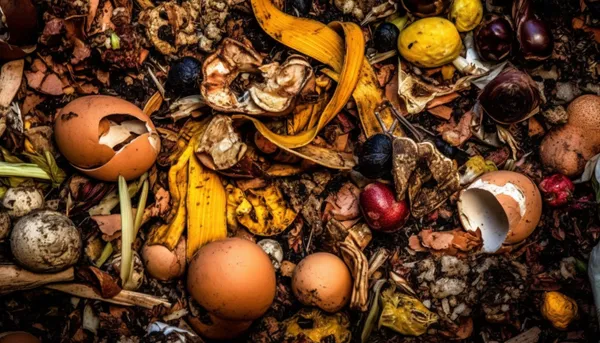
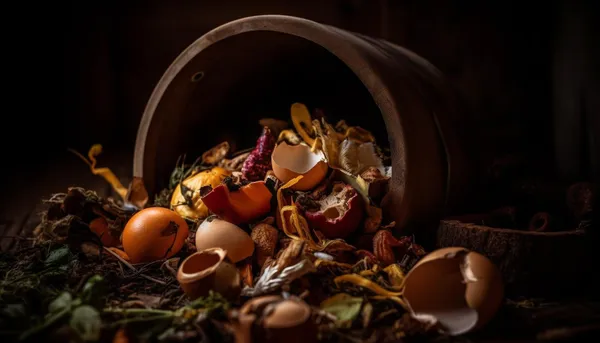
Decomposing food waste, Freepik.
Vermicomposting in a laundry room
Some indoor composters opt for laundry rooms due to their typically stable temperatures, availability of space, and convenient proximity to food waste sources. Still, laundry rooms can be humid, especially if there's a dryer present.
Dryers can raise ambient temperatures and humidity levels in the laundry room. Excessive heat can stress worms, while high humidity may lead to anaerobic conditions in the worm bin. To start with, avoid placing the bin near direct heat sources like dryers or heaters. Ensure your bin has proper ventilation and drainage.
Balance between food scraps and bedding is essential to prevent odours. For every handful of food, add an equal amount of bedding like shredded paper or cardboard. If the bedding is still too wet, add additional dry bedding materials.
Consider using a moisture meter to accurately monitor the moisture level in your worm bin. If worms appear sluggish or are attempting to escape.Yes, your worms might actually try to escape — don’t panic! Thisreaction may indicate unfavourable conditions such as excessive heat or moisture.
Deal with pests and insects
While vermicomposting doesn’t typically attract pests when managed correctly, you might occasionally spot fruit flies, gnats, or mites. These are often signs of overfeeding or excess moisture.
By maintaining proper feeding practices, moisture levels, and bin hygiene, you can prevent most pest issues in vermicomposting. Always bury food scraps at least 2-3 cm beneath the bedding — out of sight, out of sniff. Introduce new food only after the previous batch has been mostly consumed.
Regularly fluff or turn the bedding to promote oxygenation, which helps prevent the development of anaerobic zones that attract pests. Adopt fine mesh or screen to prevent adult insects from entering and laying eggs
Should pests appear, prompt and appropriate interventions will help restore a healthy environment for your composting worms. Introduce beneficial organisms like predatory mites or nematodes to control pest populations without harming the worms.
If ants are a problem, place the bin legs in containers of water to prevent their access. For mite infestations, reduce moisture and remove infested food sources.
Recommended worm bin capacity per person
Having stressed the importance of not overfeeding worms, as well as the limited availability of space in urban apartments, we invite you to determine the appropriate capacity for your compost container now.
A 15-gallon bucket (approximately 57 litres) is suitable for the first adult. For each additional person, add 10 gallons (approximately 38 litres) on top. This size accommodates about one pound (0.45 kg) of worms, which can process up to 0.5 pounds (0.23 kg) of food waste daily.
Ensure that the chosen bin size fits comfortably in your available space, whether it's a balcony, or a kitchen corner. Households that produce more organic waste, such as larger families, should consider larger or multiple bins to accommodate the increased volume.
At the end of the day, don’t stress about exact numbers. But just aim for a bin that fits your leftovers and doesn’t overcrowd the worms!
Worm composting timeline
Vermicompost isn’t quite soil, but it’s pretty close. Think of it as nutrient-packed dirt that helps your garden thrive. The time it takes for compost to mature varies based on several factors, including the composting method, materials used, and environmental conditions.
Mature compost is generally considered to have a pH ranging from slightly acidic to slightly alkaline, typically between 6.0 and 8.0. This range is suitable for most plants, as it supports optimal nutrient availability and microbial activity.
When worm composting, how long does it take to make? On average, 3–6 months, depending on these factors:
- Material balance. A balanced ratio of "green" (nitrogen-rich), like fruit scraps and grass clippings, and "brown" (carbon-rich) materials such as dry leaves and cardboard is crucial.
- Moisture and aeration. Maintaining adequate moisture and regularly turning the pile promote faster decomposition.
- Particle size. Smaller bits of organic matter break down more quickly.
- Temperature. Higher internal temperatures accelerate microbial activity, speeding up the composting process.
- Worm population. The more worms you have, the faster they can process organic waste.
How to use vermicompost in potted plants for an improved garden harvest
Compost is highly beneficial for potted plants, whether indoors or on a balcony. It enriches the potting mix with essential nutrients, enhances soil structure, and supports plant health.
Before use, ensure your compost is fully decomposed and has an earthy smell. It's dark and crumbly, free of recognisable food scraps That’s when it’s ready to go. Unfinished compost can in fact harm plants by introducing pathogens or causing nitrogen imbalance.
In particular, vermicompost results from worm castings (same as worm poop). This explains why vermicompost typically contains higher levels of essential nutrients such as nitrogen, phosphorus, and potassium compared to traditional compost.
It also boasts a greater concentration of beneficial microorganisms and enzymes that aid in plant growth. Its fine, granular texture of vermicompost improves soil aeration, water retention, and structure. Due to its potency, vermicompost is often used in smaller quantities.
Decomposing food waste, Freepik.
But how to use worm compost? Make these tips yours:
- Mix with potting soil. Combine compost with potting soil at a ratio of 25 to 50% compost. This blend provides a balanced medium that supports plant growth without overwhelming the root.
- Top-dressing. Apply a 1–2 inch (2.5–5 cm) layer of compost on top of the soil in your pots. This method gradually releases nutrients as you water, benefiting the plants over time.
- Avoid using compost alone. While compost can make your soil more fertile, it's best not to use it as the sole medium or the core in pots. Mix it with potting soil to ensure proper drainage and aeration.
After adding compost, observe your plants for signs of over-fertilisation, such as leaf burn or stunted growth. Refresh the compost layer or mix annually to replenish nutrients and maintain soil health.
Worm tea (vermicompost tea)
Worm tea is generally considered a "lighter" fertiliser than solid vermicompost. This distinction arises from differences in nutrient concentration, release rates, and application methods. Worm tea is in fact a liquid extract, produced by steeping or brewing vermicompost in water. It’s milder, which makes it perfect for sensitive plants or young seedlings.
Vermicompost tea is rich in beneficial microbes, including bacteria, fungi, protozoa, and actinomycetes. These microorganisms are known to enhance soil microbial diversity and suppress plant pathogens.
As compared to regular compost tea, worm tea typically has a higher concentration of beneficial microbes due to the digestive processes of worms. While compost tea often requires aeration for 24-48 hours, worm tea can be prepared more quickly, sometimes overnight.
Worm tea is ideal for foliar sprays or soil drenches: splash it on the leaves or soil to deliver nutrients and beneficial microbes directly to plant leaves or root. Its liquid form allows for rapid absorption, making it suitable for addressing immediate nutrient deficiencies or boosting plant health during critical growth stage. On the other hand, vermicompost offers a heavier, slow-release option.
What is worm farm conditioner?
Worm farm conditioner is a blend of natural minerals and substances designed to support the health of your worm bin. Common ingredients include:
- Zeolite. A mineral that improves soil structure and aids in nutrient retention.
- Dolomite (agricultural lime). Helps neutralise acidity and provides calcium and magnesium levels.
- Rock dust. Supplies essential trace minerals.
- Seaweed and biochar. Enhance microbial activity and nutrient availability.
Add one to two teaspoons of conditioner to your worm bin weekly. Sprinkle evenly over the surface of the bedding or mix with food scraps before adding to the bin. Keep an eye on your worm bin for signs of imbalance, such as foul odours or slow worm activity.
Benefits of using worm farm conditioner
Worm conditioner is ideal to create a balanced environment, promoting efficient decomposition and robust worm health:
- pH regulation. Maintains a neutral pH, preventing conditions that could harm worm.
- Odour control. Reduces unpleasant smells by balancing the composting environment.
- Enhanced nutrient content. Enriches worm castings with additional minerals, improving their value as a fertiliser.
- Improved worm health. Provides essential nutrients that support worm vitality and reproduction.
- Increased composting efficiency. Facilitates faster breakdown of organic matter, leading to quicker compost production.
Wooden bin and food scraps lying on the floor, Freepik.
Why vermicomposting produces less methane
Vermicomposting generally produces significantly less methane gas compared to traditional composting methods. This is primarily because worms do the dirty work.
As they wriggle around, they aerate the compost preventing the anaerobic environments that lead to methane production. Additionally, their digestive processes and their associated microbial communities favour aerobic decomposition, further reducing methane emissions.
While vermicomposting minimises methane emissions, certain conditions can still promote methane production. For instance, overly wet conditions can create anaerobic pockets within the compost.
Lack of proper airflow can also result in oxygen-deprived zones, facilitating anaerobic decomposition. Last but not least, an imbalance of nitrogen-rich "greens" and carbon-rich "browns" can disrupt the composting process, potentially leading to anaerobic conditions.
Start your indoor worm compost today
Vermicomposting is more than just a way to reduce food waste — it's a small act of resistance against the throwaway culture of cities. But vermicompost is not just any compost. Nothing beats vermicompost when it comes to beginners and city dwellers.
All you need is a bin, some worms, and a little curiosity. Start small, stay consistent, and soon enough, you’ll be turning banana peels into a rich, living fertiliser that will enhance the health of your potted plants. This is a fantastic way to process your household’s food scraps while creating premium compost for your plants.
This post contains Amazon affiliate links. As an Amazon Associate, I earn from qualifying purchases.